Use case 1: Model server and MPS
This use case shows how model data can be synced between an MPS instance and a model server. This makes model data, previously accessible only in a running MPS or via files, available through a server.
The synchronization needs to be initialized from MPS using the model-server-sync-plugin.
Demonstration

Instructions
Get the code
Clone or download the code from the samples repository.
Setup MPS
Execute the following command to set up the MPS project under mps/project-mps-backend.
It installs the
model-server-sync-plugin and its dependencies.
./gradlew mps:project-mps-backend:buildStart a model server
docker-compose --profile useCase1 upThis command starts a model server under http://localhost:28101/
Connect to the model server
-
In the 'Cloud' tool window, right-click on
Cloudand selectAdd Model Server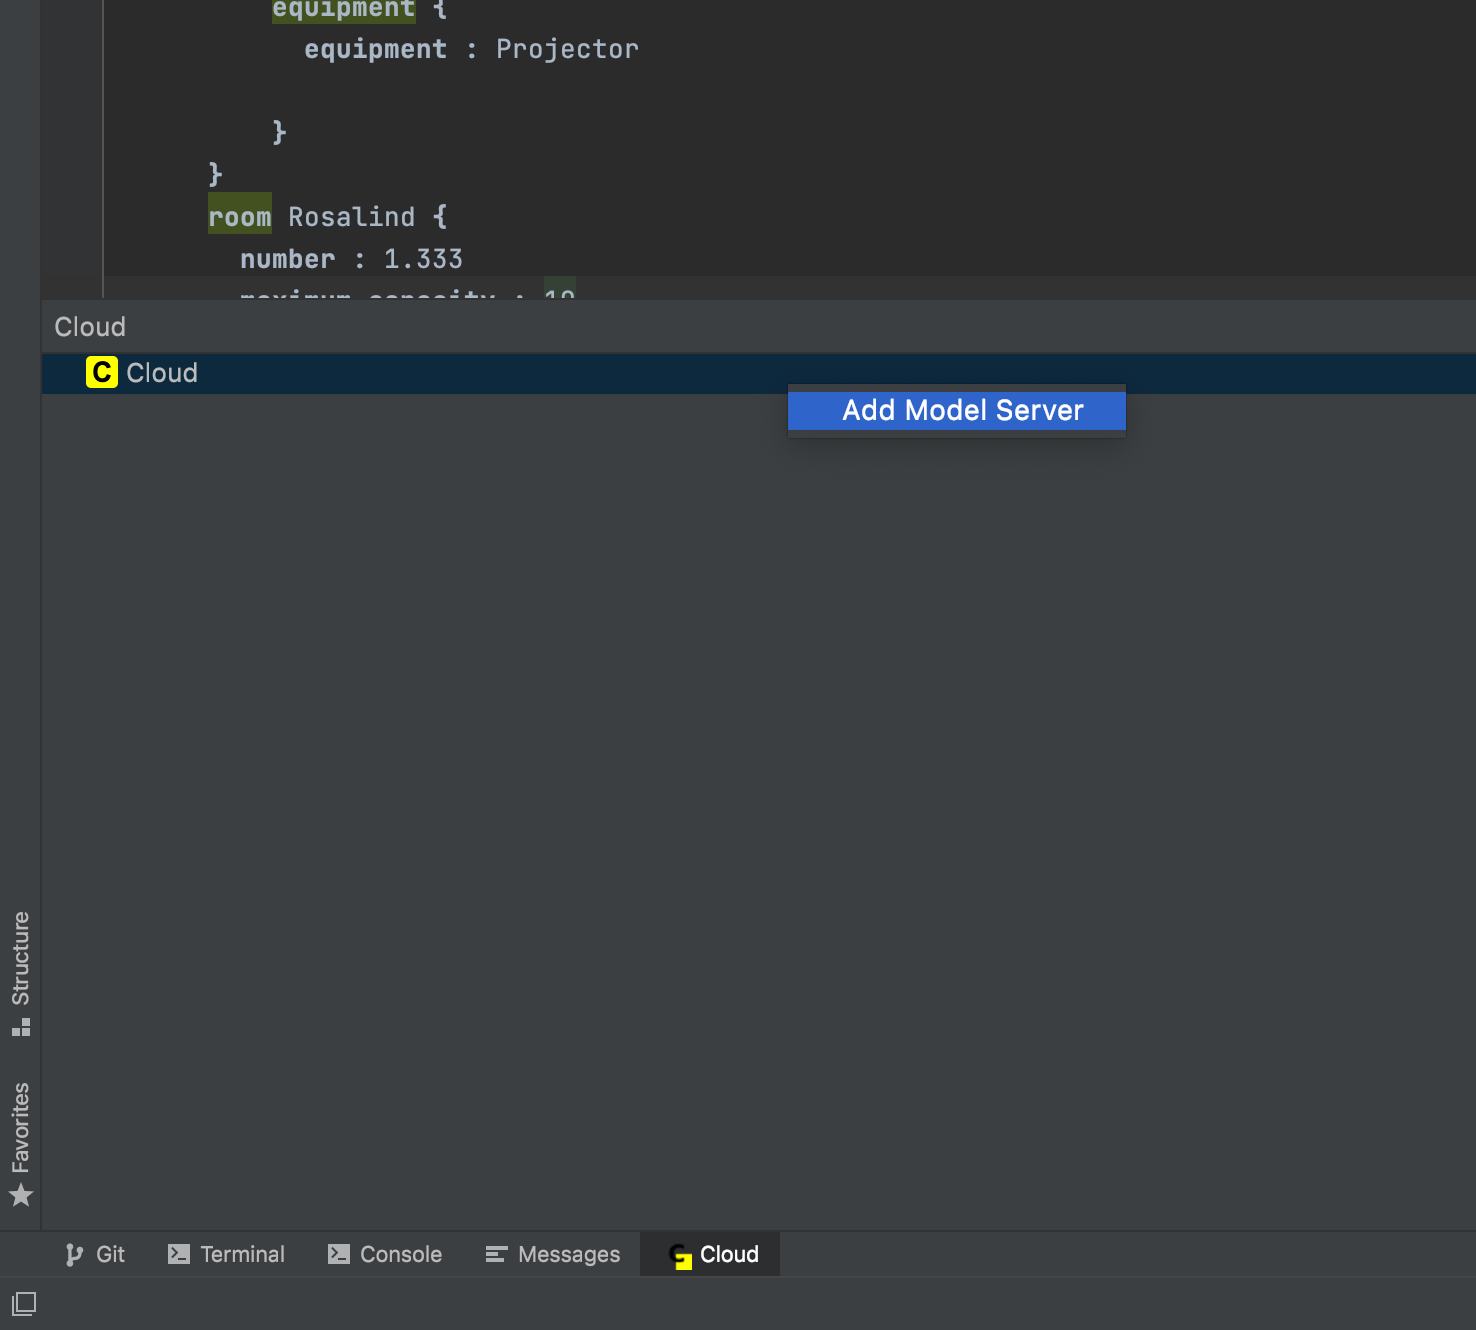 Figure 3. Adding a model server
 -
Enter
http://localhost:28101/as the model servers URL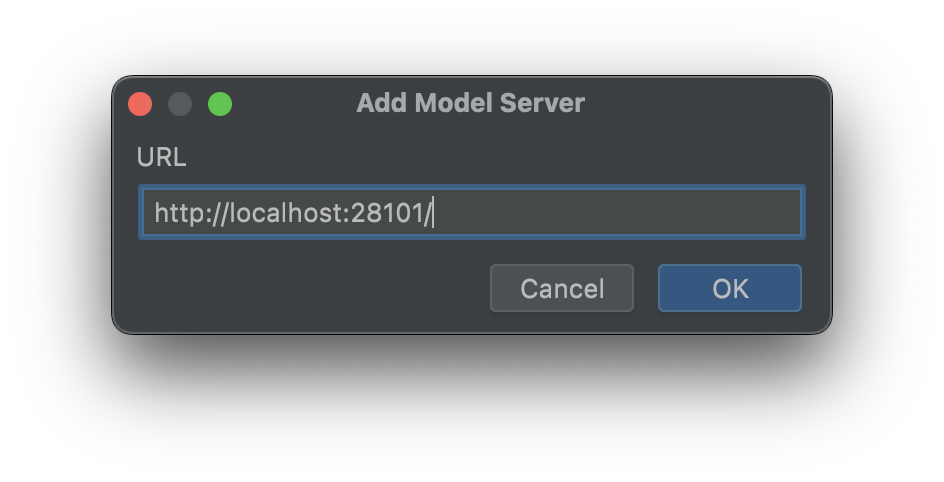 Figure 4. Entering the address of the model server
 -
In the Cloud tool window, right-click on the added server and select
Add Repository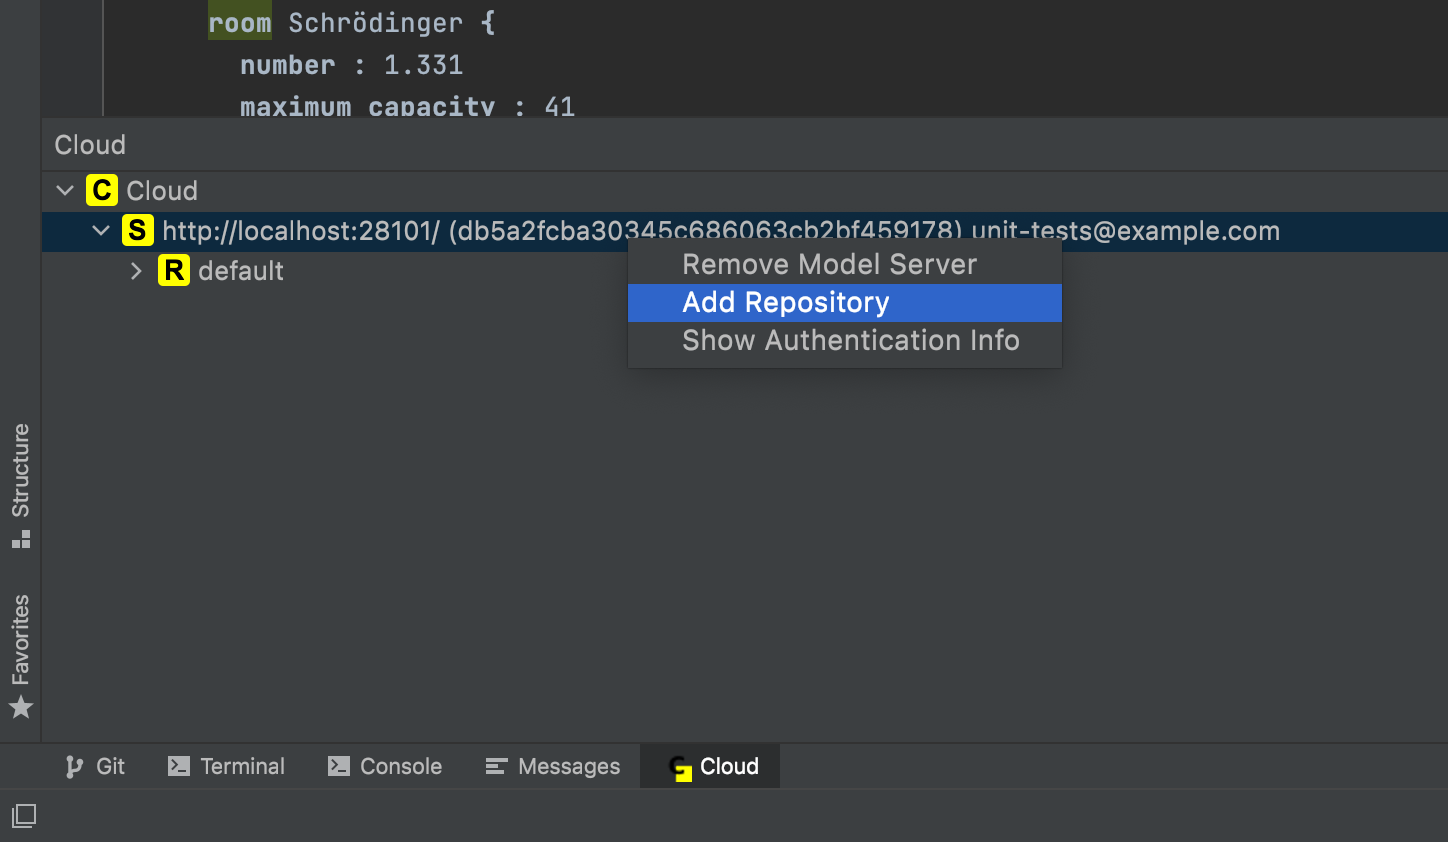 Figure 5. Adding a repository
 -
Enter
coursesas the repository name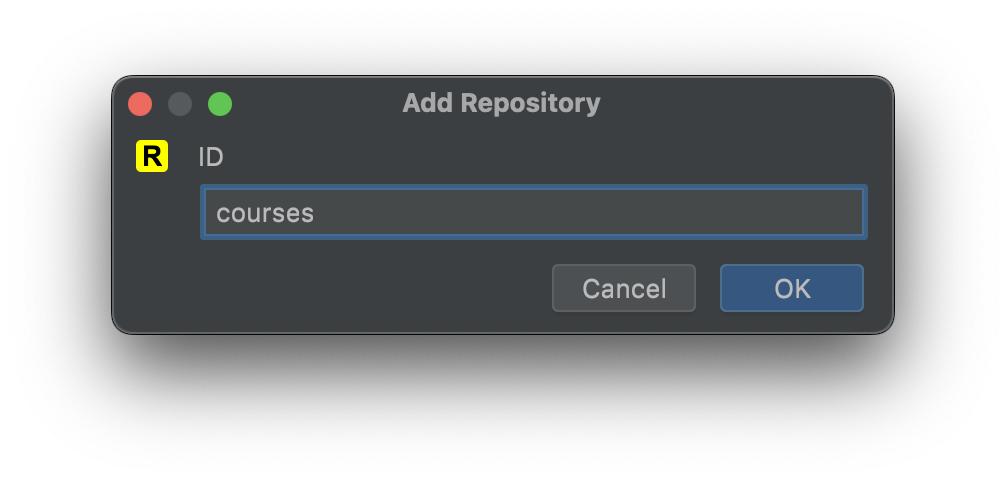 Figure 6. Entering repository name
 -
Right-click the
University.Schedule.mps.backend.sandboxsolution and selectCloud Actions > Copy on Cloud and Sync → http://localhost:28101/courses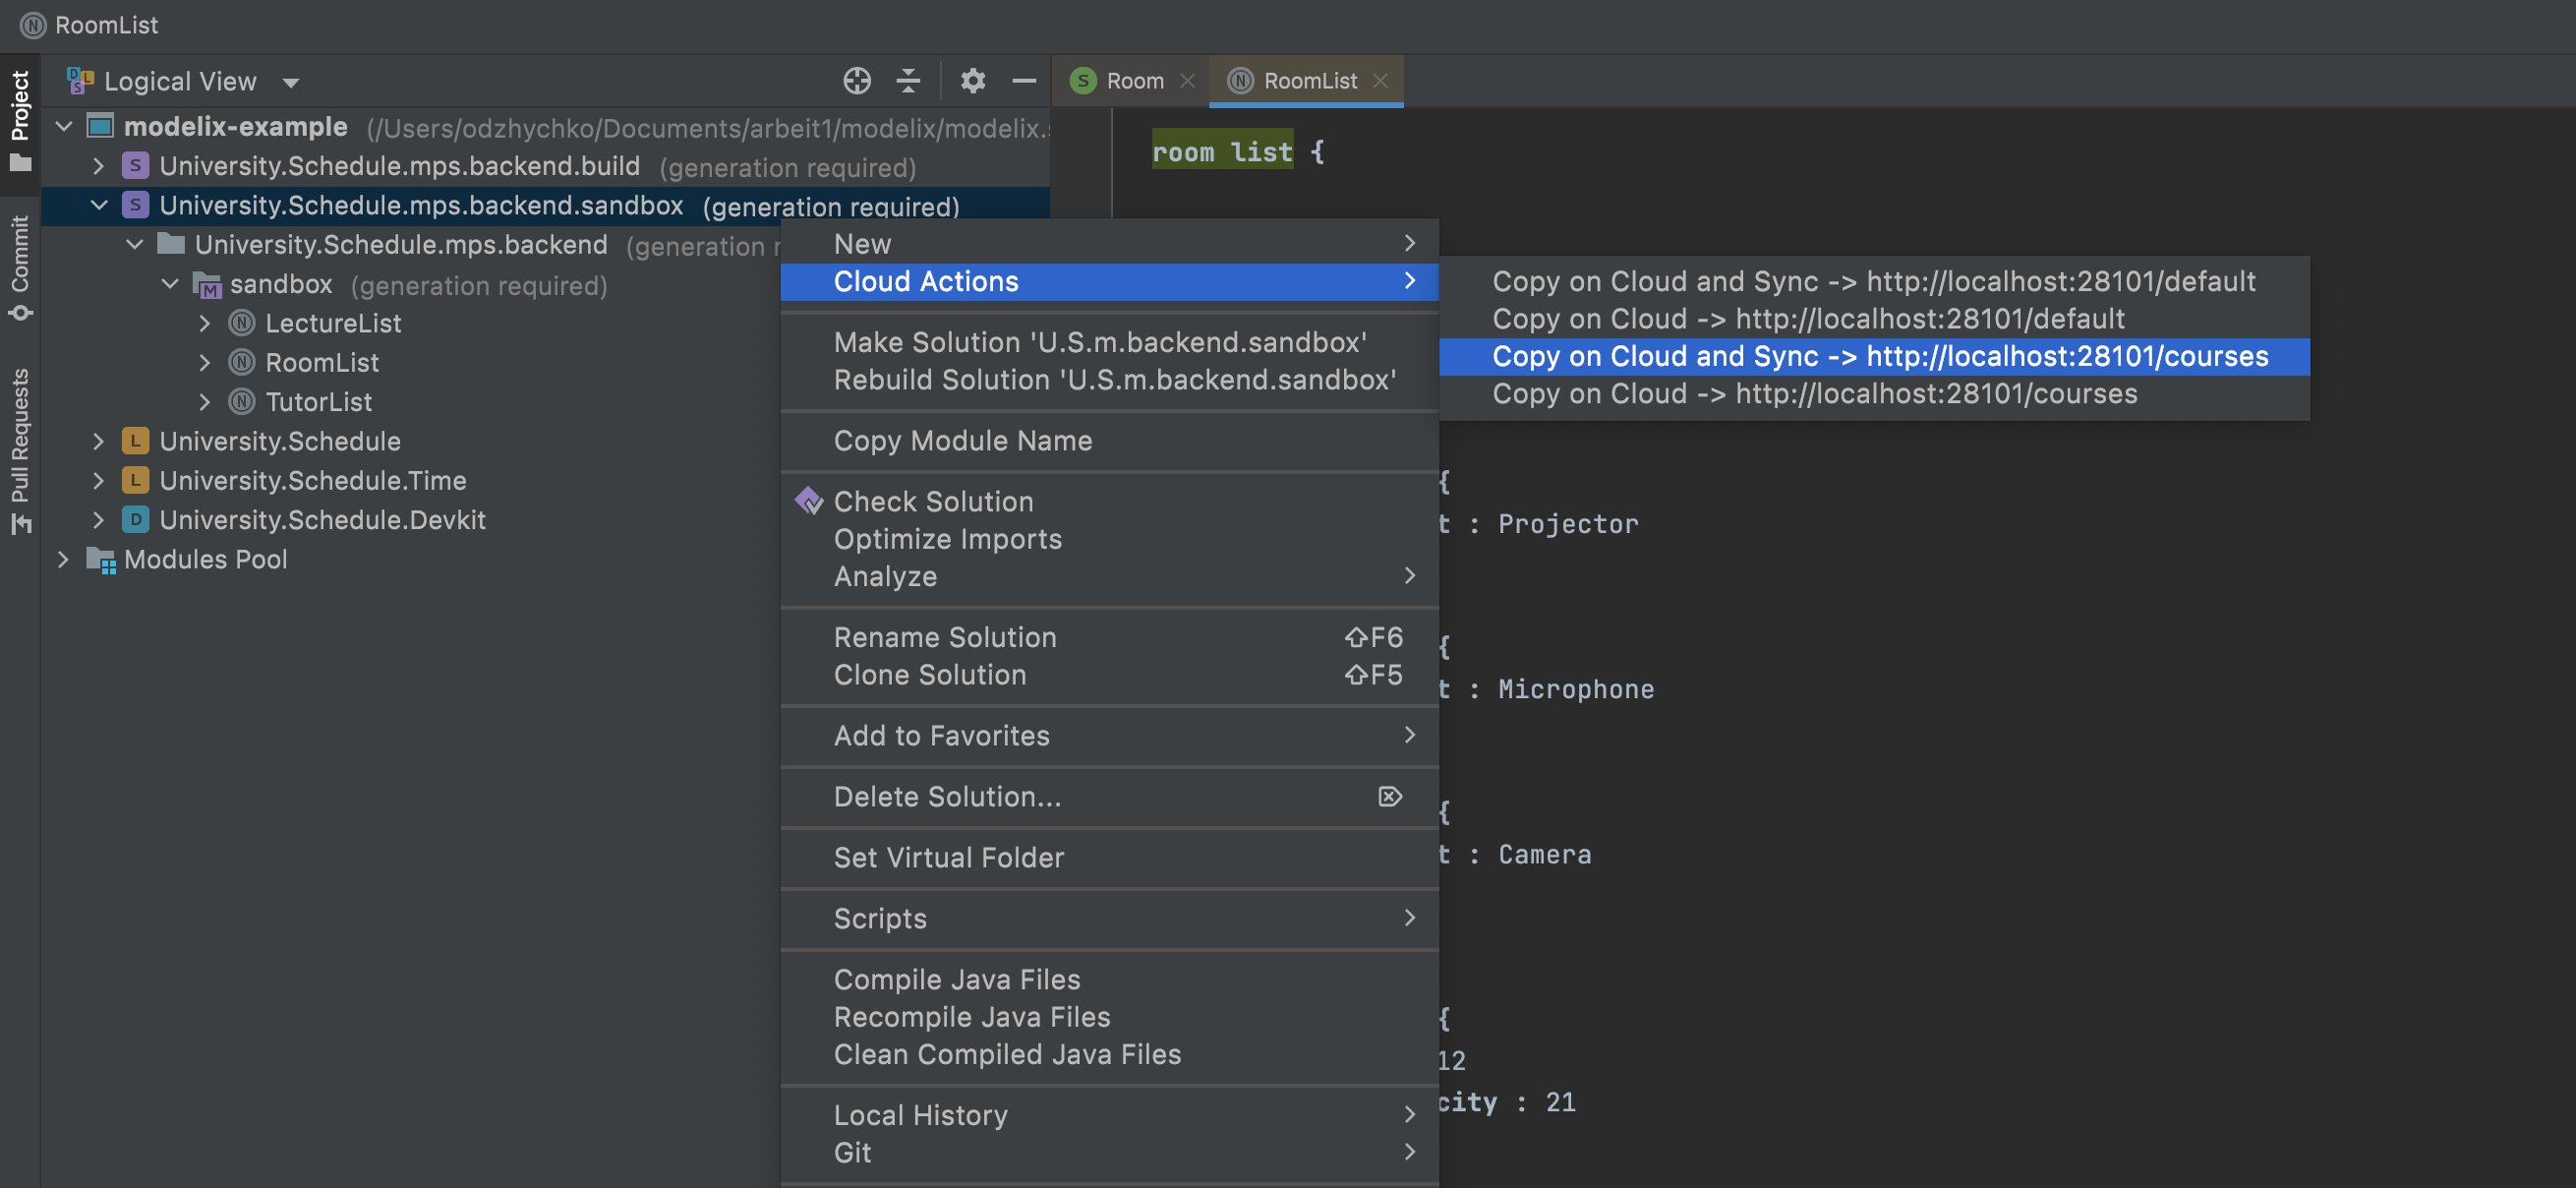 Figure 7. Synchronizing solution
 -
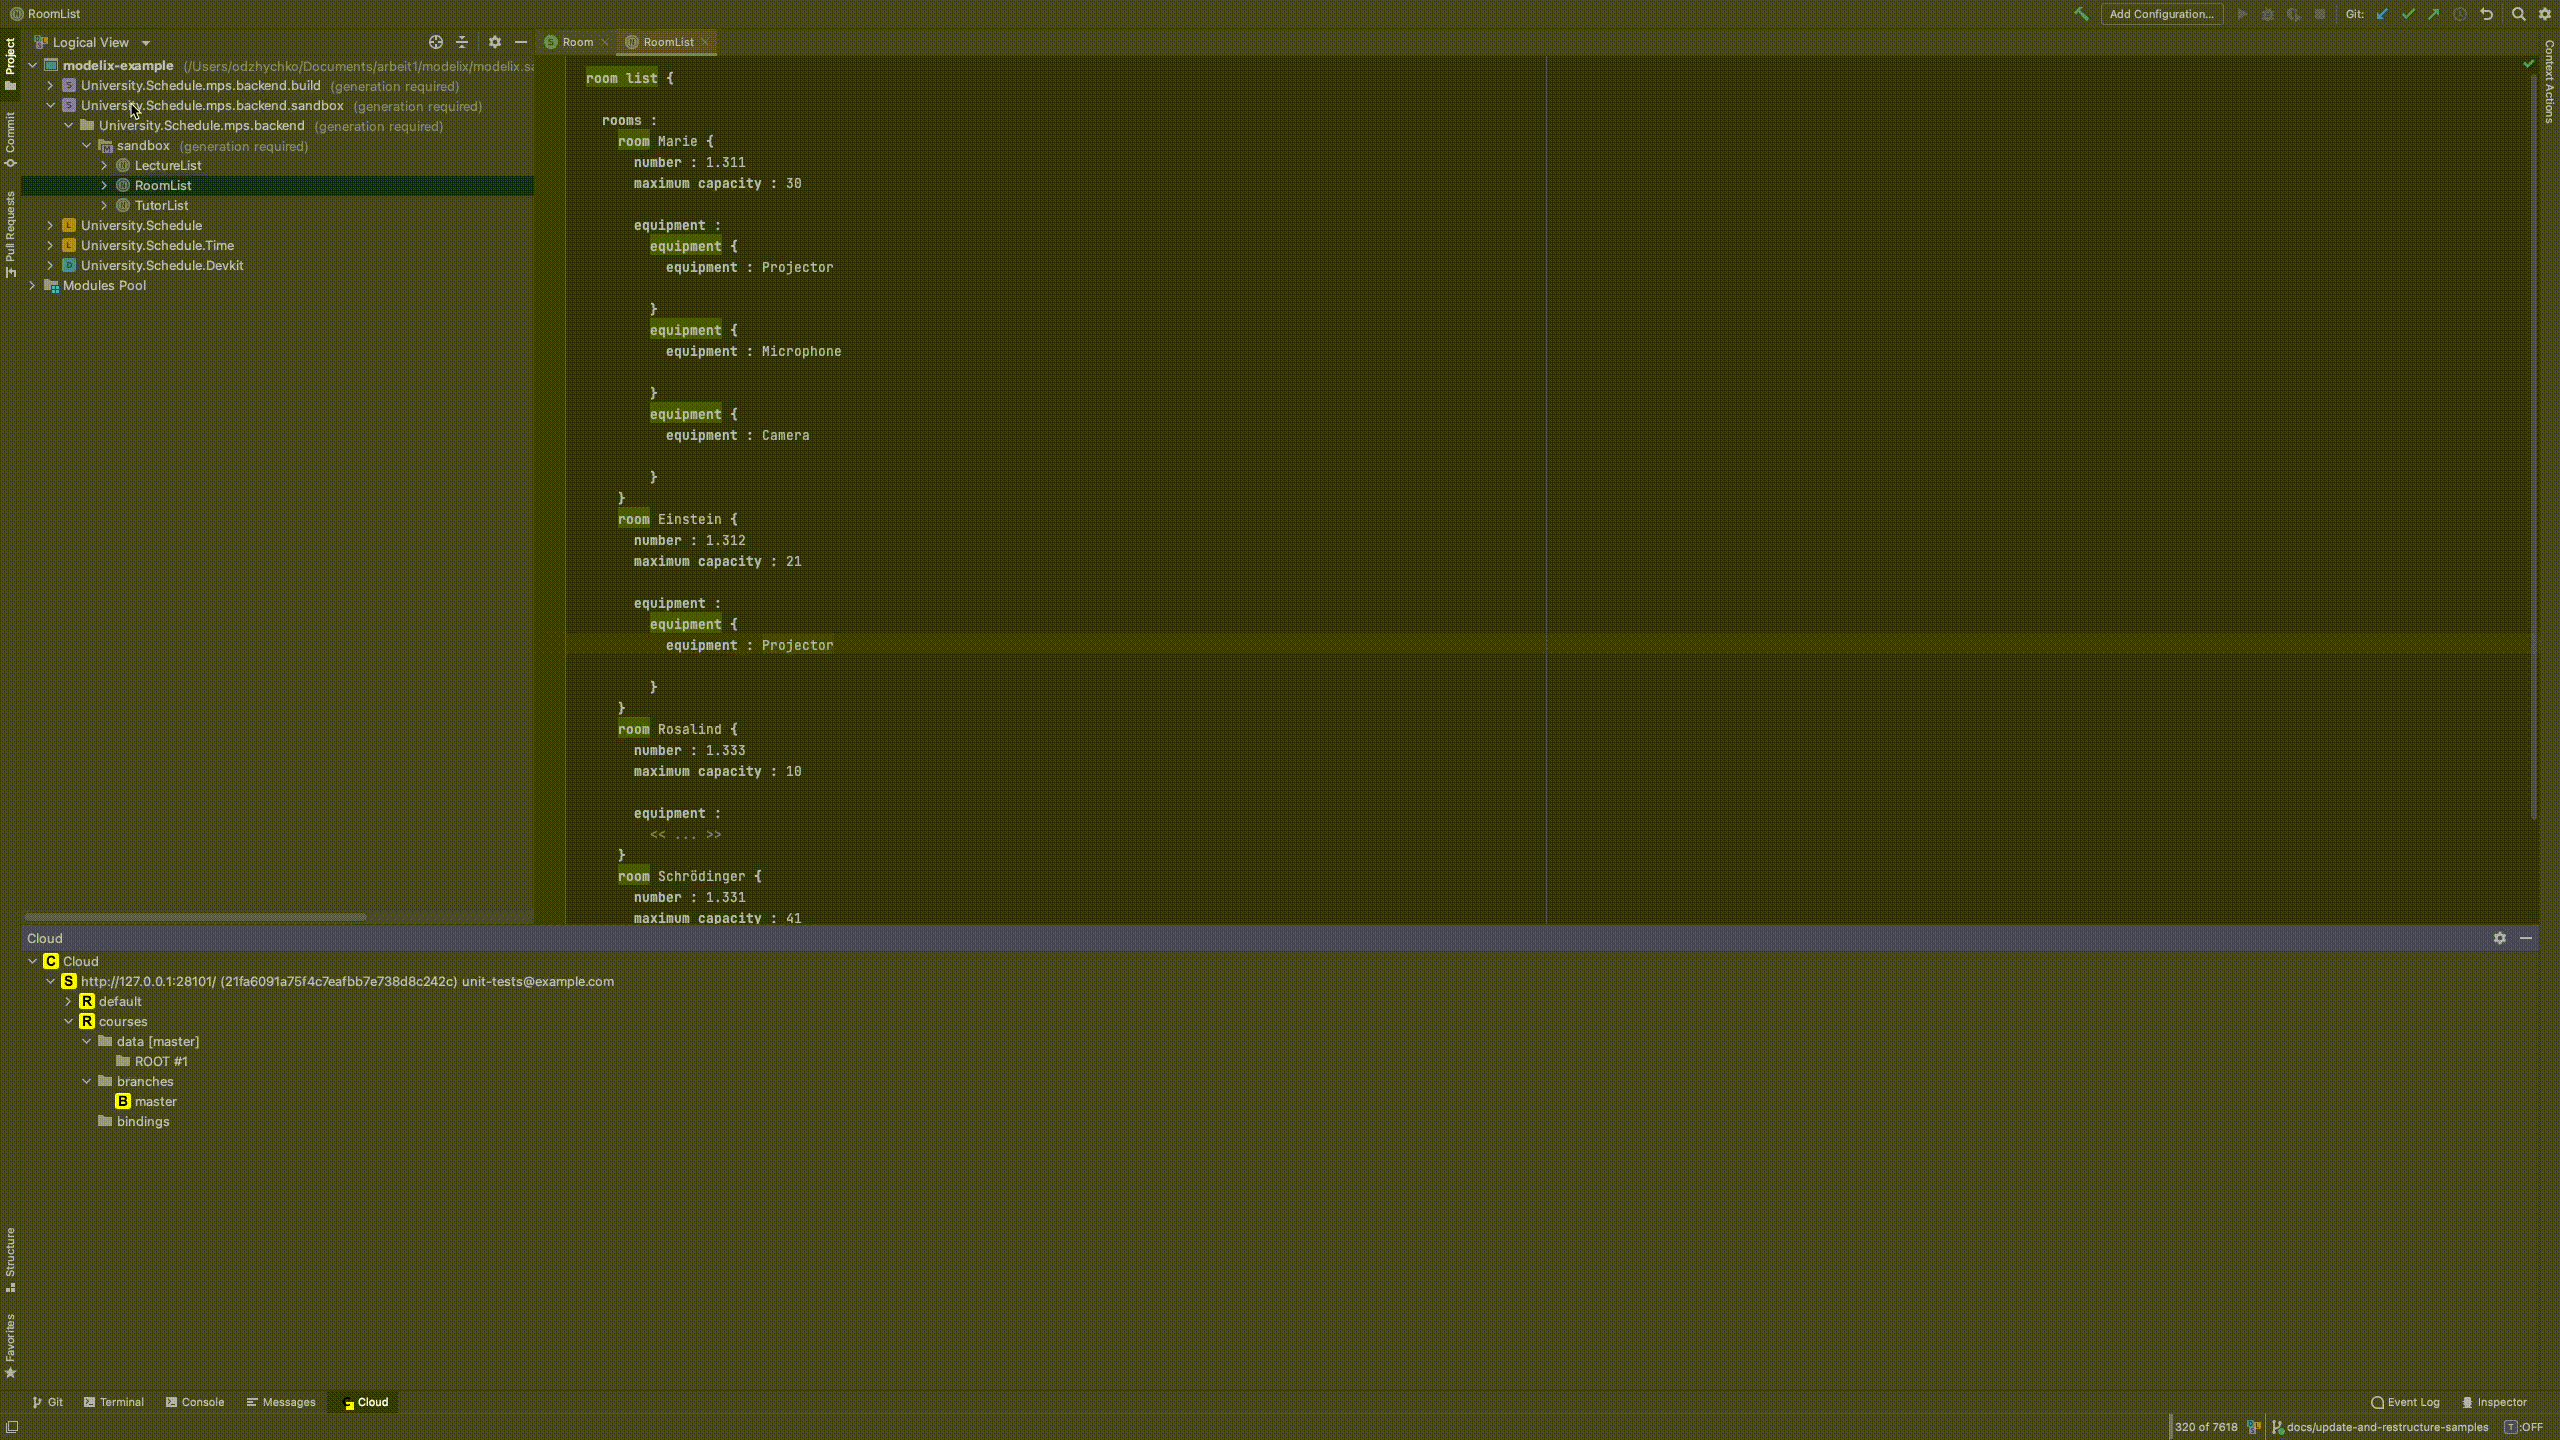
Explore synchronized data in the
Cloudtool window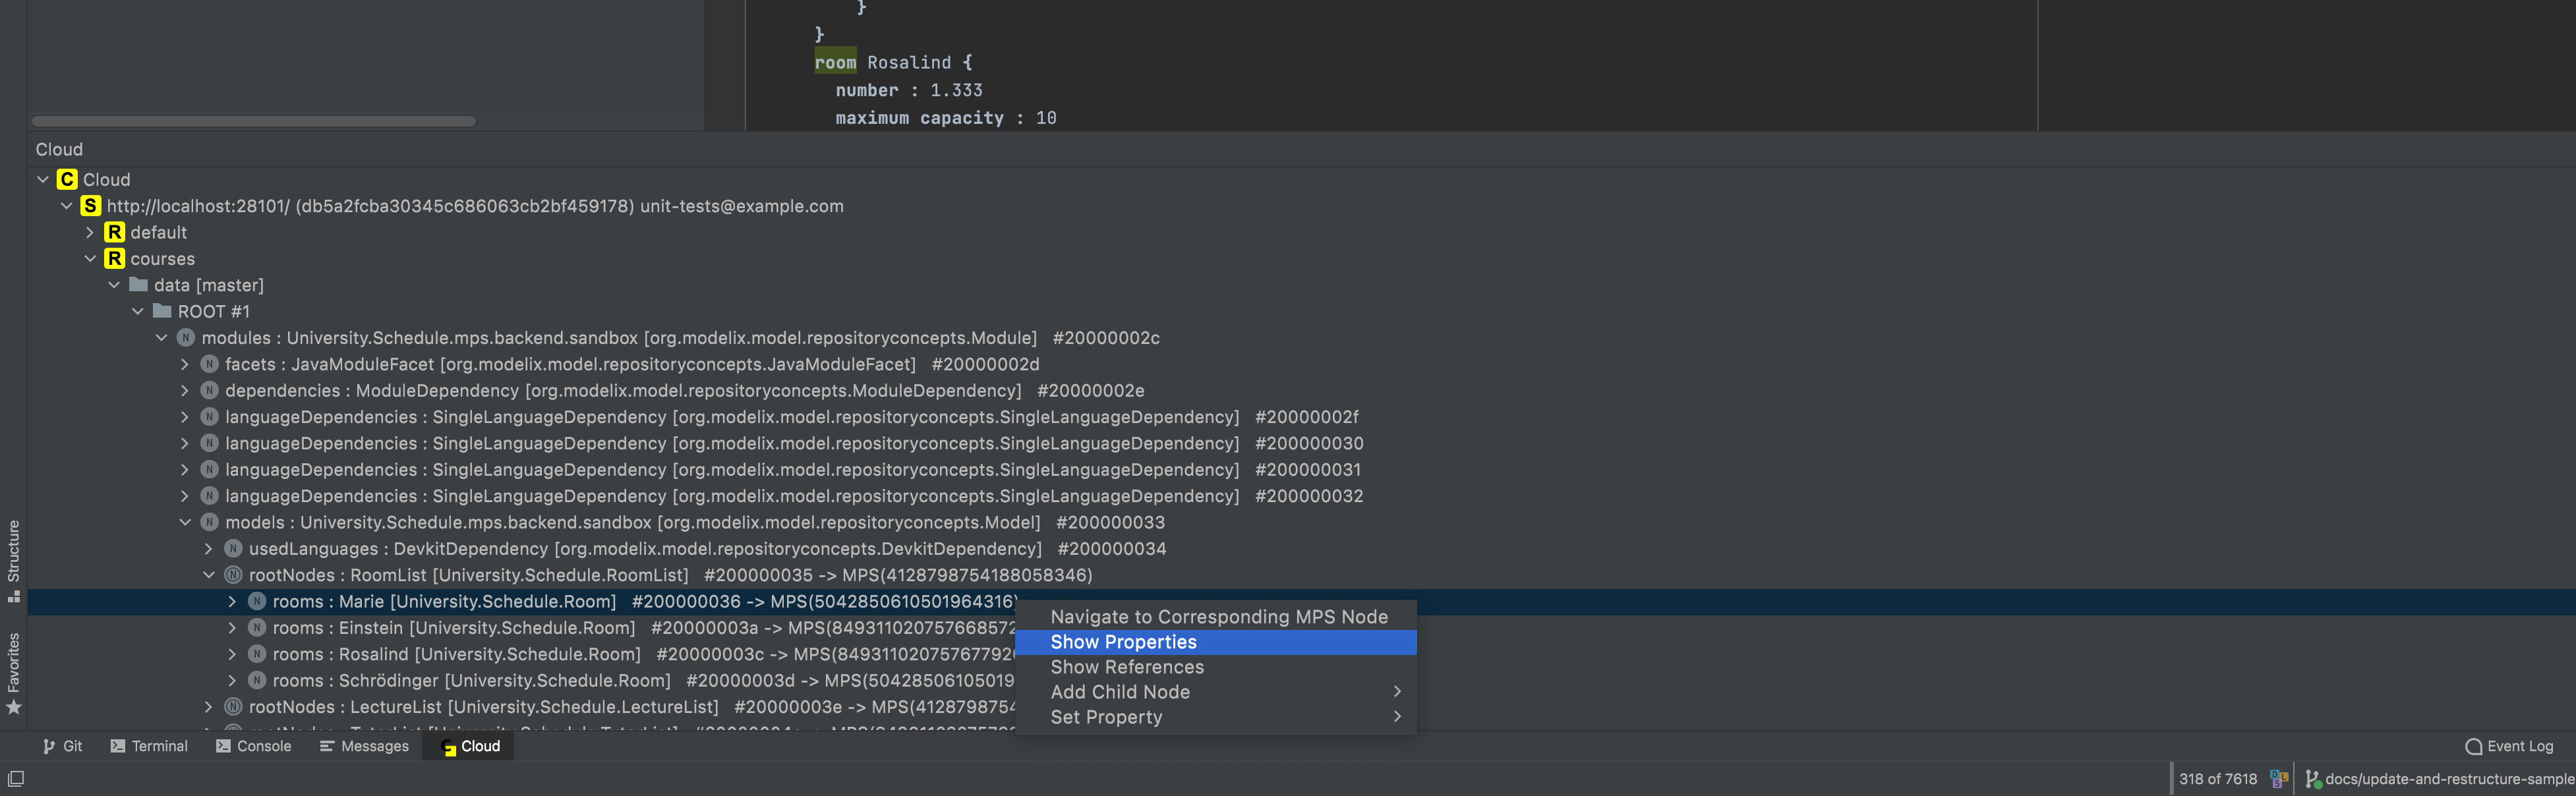 Figure 8. Exploring synchronized data